 By Colin Foster
Updated November 2026
If your yard machine riding lawn mower won’t start, the cause is usually one of a handful of common problems: a weak battery, a bad connection, a safety interlock that isn’t satisfied, fuel that isn’t reaching the engine, or a starter that isn’t engaging. This guide walks you through checking each of these in a logical order, starting with the cheapest and easiest tests, so you can find the fault without guesswork. By the end you should know which symptom points to which cause and what to do next.
Start With Symptoms: What Is the Mower Actually Doing?
Before you touch a tool, pay attention to exactly what happens when you turn the key or press the start button. The symptom narrows the field considerably.
Shopping for one? See our guide: 7 Best John Deere Riding Lawn Mower Won't Start Parts Compareds (2026).
- Nothing happens at all, no lights, no sound: Usually a dead battery, a loose or corroded main cable, or a blown main fuse.
- A single loud click, then silence: Typically a low battery or a starter solenoid that is pulling in but not passing enough current to the starter motor.
- Rapid clicking: Almost always the battery is too weak to hold the solenoid closed. Charge or replace it first.
- The starter cranks but the engine won’t fire: Look at fuel delivery, spark, or air/fuel mixture rather than the electrical system.
- The engine starts, then dies immediately: Often a safety switch problem, a clogged fuel filter, or a choke or throttle setting issue.
Write down which symptom matches your mower. You will use it to choose the right section below.
Tools and Supplies You’ll Need
Most of these checks need only basic hand tools. Having the following on hand will save you trips back to the garage:
- A digital multimeter set to DC volts
- Socket set and combination wrenches (typically 8 mm, 10 mm and 13 mm)
- A wire brush or sandpaper for cleaning battery terminals
- Baking soda and water for neutralizing acid corrosion
- A battery charger or a fully charged replacement battery
- Fresh gasoline (ethanol-free if possible) and a clean fuel container
- Dielectric grease for protecting terminals after cleaning
- A spark plug wrench and a spare plug for testing
Step 1: Check the Battery Voltage
A weak battery is the most common reason a yard machine riding lawn mower won’t start, especially after it has sat through a season. Set your multimeter to DC volts and touch the probes to the battery posts, red to positive and black to negative.
Reading the Results
- 12.6 volts or higher: The battery is fully charged and in good shape.
- 12.2 to 12.5 volts: Partially discharged. Charge it fully and retest.
- Below 12.0 volts: Deeply discharged. Charge it, then load-test it. If it won’t hold charge, replace it.
Batteries that won’t accept a charge, swell, or leak should be replaced right away. Wear eye protection and gloves when handling lead-acid batteries, and keep sparks and open flame away from them.
Step 2: Inspect and Clean the Battery Connections
Corroded or loose cables can drop enough voltage that the starter never gets adequate current. Disconnect the negative cable first, then the positive. Scrub the posts and clamps with a wire brush, and neutralize any white or bluish crust with a baking soda and water solution. Dry everything thoroughly, reconnect the positive cable first, then the negative, tighten the clamps firmly, and apply a thin coat of dielectric grease.
Also check the ground cable where it bolts to the frame or engine block. A bad ground often produces the same no-start symptoms as a dead battery, and it is easy to overlook.
Step 3: Confirm the Safety Interlock System Is Satisfied
Riding mowers are designed not to crank unless certain conditions are met. Yard Machine models, like most riding mowers, typically require the operator to be seated, the parking brake to be engaged, and the blade engagement (PTO) switch to be disengaged. If any of these conditions isn’t met, the starter circuit stays open.
- Sit firmly on the seat. Some seat switches need your full weight to close.
- Make sure the blade engagement lever or switch is fully in the off position.
- Fully set the parking brake, then test whether the brake switch is engaging.
- Check the clutch and brake pedal positions, if your model has them.
Switches collect dirt and can fail with age. You can test a suspect switch with a multimeter in continuity mode. Consult the owner’s manual for the wiring diagram specific to your model, since switch locations vary between production years.
Step 4: Check the Fuel System
If the engine cranks strongly but never fires, fuel is the next suspect. Gasoline that has sat for more than about a month can break down, leaving varnish that clogs jets and passages.
Fuel Checks
- Confirm there is fresh fuel in the tank. Stale fuel is a frequent culprit after winter storage.
- Inspect the inline fuel filter for debris or discoloration and replace it if it looks dirty.
- Check the fuel shutoff valve, if equipped, and make sure it is open.
- Pull the fuel line at the carburetor inlet and see whether fuel flows when you crank briefly. Take care to contain it and keep sources of ignition away.
If the tank is old or the fuel smells sour, drain it and refill with fresh gasoline. Many owners find that adding a fuel stabilizer at the end of each season prevents most of these problems.
Step 5: Test the Spark
No spark means no ignition, no matter how well the engine cranks. Remove a spark plug, reattach the plug wire or boot, and ground the plug’s metal body against the engine. Have a helper crank the engine while you watch the gap. A strong blue or white spark indicates good ignition. Weak or no spark points to a bad plug, a faulty ignition coil, or a damaged kill switch wire.
Also inspect the plug itself. A fouled, oily, or wet plug suggests an over-rich condition. A white, blistered electrode can mean overheating or a lean condition.
Step 6: Check the Starter Solenoid and Starter Motor
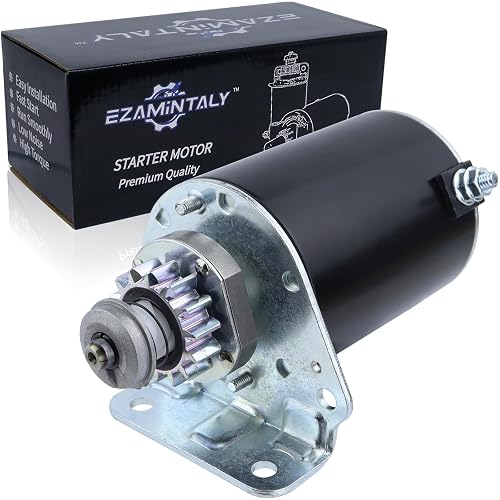
If you hear a single click when you turn the key, the solenoid is likely engaging but the starter motor isn’t receiving enough current, or the motor itself is worn. Try tapping the starter lightly with a wrench handle while someone cranks the engine. If it suddenly spins, the brushes or motor are worn and replacement is the reliable fix. A starter that makes no sound at all may have a failed solenoid or a bad connection on the small control wire.
Step 7: Verify Air and Throttle Settings
Finally, confirm the controls are set correctly for a cold start. Many riding mowers need the choke engaged when the engine is cold and the throttle at the start position. A flooded engine, the result of too much choke or repeated cranking, can be cleared by holding the throttle wide open and cranking for a few seconds with the spark plug removed, then reinstalling the plug and trying again.
Also check the air filter. A severely clogged element can make a cold engine hard to start, and it’s inexpensive to inspect and replace.
Common Mistakes
- Replacing the starter first. Most no-start problems are electrical basics or fuel. Test the battery and connections before buying parts.
- Ignoring a partially charged battery. A battery at 12.2 volts may crank weakly and mislead you into blaming something else.
- Cranking endlessly. Long cranking drains the battery and can flood the engine. Crank in short bursts of a few seconds.
- Using old fuel. Gasoline degrades quickly, and ethanol blends can absorb moisture over time.
- Overlooking the ground cable. A corroded ground can produce symptoms identical to a dead battery.
- Skipping the owner’s manual. Switch and wiring layouts differ by model year, and the manual is the fastest path to the correct test points.
Tips for Preventing Future No-Start Problems
- Keep the battery on a maintainer or trickle charger during storage.
- Add fuel stabilizer to the tank before long periods of inactivity, and run the engine briefly so treated fuel reaches the carburetor.
- Clean battery terminals at the start of each mowing season.
- Replace the spark plug and air filter on the schedule listed in your manual.
- Test the safety switches once a season so you catch a failing switch before it strands you in the middle of a job.
Recommended gear
A basic multimeter is the single most useful tool for this kind of diagnosis, since it lets you confirm battery voltage and test switch continuity instead of guessing. A battery maintainer helps keep the battery healthy between uses, and dielectric grease protects clean terminals from re-corroding. For fuel problems, a fuel stabilizer added before storage prevents many of the varnish issues described above.
- Digital multimeter for testing voltage and continuity View on Amazon
- Battery maintainer and trickle charger for riding mower batteries View on Amazon
- Dielectric grease for battery terminals View on Amazon
- Small-engine fuel stabilizer View on Amazon
Related Guides
If your problem has a more specific symptom, the troubleshooting walkthroughs on this site may help. For a mower that starts but dies, see Riding Lawn Mower Won't Start But Turns Over: 4 Best Parts Compared (2026). If you hear rapid clicking, Husqvarna Riding Lawn Mower Won't Start No Clicking: 7 Causes and Fixes covers a similar electrical path. Owners who’ve had the machine sit through winter may find Riding Lawn Mower Won't Start After Winter: 7 Fixes to Try First especially useful, and Troubleshooting a Lawn Mower That Won't Start: 8 Steps to Fix It offers a broader checklist.
FAQ
Why does my Yard Machine riding mower click but not start?
Repeated clicking usually means the battery doesn’t have enough voltage to hold the starter solenoid closed. Charge the battery fully, clean the terminals, and retest. If the clicking continues with a good battery, check the main cable connections and the starter itself.
Can a Yard Machine mower start with the seat empty?
Most riding mowers are designed to prevent starting unless the operator is seated, though the exact behavior depends on the model. If the engine won’t crank with you seated, inspect the seat switch and the wiring to it.
How do I know if the battery or the starter is bad?
Measure battery voltage first. A fully charged battery that still produces only a click or a weak crank points more toward the starter or its connections. A battery that drops below about 12 volts under cranking is likely the problem.
Why does the mower start and then stall?
This often points to a restricted fuel supply, a clogged fuel filter, an air or choke setting problem, or a safety switch that cuts the engine during operation. Start with the fuel filter and the seat and brake switches.
Does old gasoline really prevent a mower from starting?
Yes. Gasoline that has sat for several weeks or months can lose its volatility and leave varnish in the carburetor jets. Draining the tank, refilling with fresh fuel, and cleaning or rebuilding the carburetor usually resolves it.
How often should I replace the spark plug?
Follow the interval in your owner’s manual, which is often annually or every set number of operating hours. A worn or fouled plug is inexpensive to replace and can prevent many starting problems.
When should I take it to a professional?
If you have tested the battery, connections, safety switches, fuel and spark and still can’t find the fault, or if you smell fuel strongly, see smoke, or are uncomfortable working on the electrical system, take the mower to a qualified small-engine repair shop.
Conclusion
Most cases where a yard machine riding lawn mower won’t start come down to a short list of causes: a weak battery, poor connections, an unsatisfied safety switch, stale fuel, or a missing spark. Work through the steps in order, starting with the battery voltage, and you will usually find the fault before you need any parts. Keep the battery charged and the fuel fresh, and most starting problems will stay away.
Ready to choose one?
About Colin Foster
Colin Foster is part of our editorial team and reviews and edits our lawn mowers guides, checking product details against manufacturer specifications and owner feedback.