As an Amazon Associate I earn from qualifying purchases. This page may contain affiliate links.
When a Husqvarna riding lawn mower won’t start no clicking is the only sign you get, the problem is almost always electrical and usually sits somewhere between the battery and the starter solenoid. In this guide you’ll learn how to narrow down the fault in order of likelihood, test each part with a basic multimeter, and fix the most common causes without guessing. Most owners can work through the checks in under an hour with basic hand tools.
What “No Clicking” Tells You
A click at the starter solenoid means the ignition circuit is delivering enough signal to close the relay, but the high-current path to the starter motor is either weak or interrupted. Complete silence, with no click and no dash lights, points further upstream: the battery, the main cable connections, a blown fuse, or an open safety interlock. Before you touch anything, note exactly what you hear and see when you turn the key.
Shopping for one? See our guide: 8 Best Lawn Mower Riding Lawn Mowers (2026): Expert Picks.
| What you observe | Most likely area |
|---|---|
| Nothing at all, no dash lights | Battery, main cable, main fuse |
| Dash lights come on, no click | Safety switches, ignition switch, fuse, wiring harness |
| Single loud click, engine doesn’t turn | Battery charge, cable corrosion, starter motor |
| Rapid clicking | Low battery voltage or poor ground connection |
Tools You’ll Need
- Digital multimeter set to DC volts
- Wrench or socket set (commonly 10 mm and 13 mm on battery terminals, check your manual)
- Wire brush and baking soda solution for cleaning terminals
- Battery charger rated for your battery type
- Owner’s manual and wiring diagram for your model
- Dielectric grease for reconnecting terminals
Step 1: Check the Battery Voltage
A weak battery is the single most frequent cause of a mower that won’t start with no clicking. Set your multimeter to DC volts and place the red probe on the positive terminal and the black probe on the negative terminal.
- 12.6 volts or higher: The battery is fully charged and healthy.
- 12.4 to 12.5 volts: Roughly 75 percent charged. Recharge and retest.
- Below 12.0 volts: Discharged. Charge fully before testing anything else.
If the battery won’t hold a charge after a full recharge, replace it. Confirm the correct battery specification in your Husqvarna manual before buying a replacement.
Clean and Tighten the Terminals
Corrosion on battery posts creates resistance that starves the starter circuit. Disconnect the negative cable first, then the positive. Scrub the posts and cable clamps with a wire brush and a baking soda and water mix, rinse with a little clean water, and dry thoroughly. Reconnect positive first, then negative, and tighten snugly. Wiggle each clamp; any movement means it needs tightening.
Step 2: Test the Main Fuse and Circuit Fuses
Riding mowers use blade-type fuses in the wiring harness. Pull each fuse out and inspect the thin metal strip inside. A broken or darkened strip means the fuse has blown. Replace it only with a fuse of the same amperage rating printed on the fuse body. Using a higher-rated fuse can let a fault cause wiring damage or a fire.
Step 3: Check the Safety Interlock Switches
Husqvarna riding mowers use safety interlocks that prevent starting unless certain conditions are met. Common ones include the seat switch, the brake or transmission pedal switch, and the blade engagement (PTO) switch. If any of these is open, the starter circuit won’t energize even with a healthy battery.
- Sit on the seat and confirm the seat switch is fully depressed by your weight.
- Set the transmission to neutral and fully press the brake pedal if your model requires it.
- Make sure the blade engagement switch is off.
- With a multimeter in continuity mode, test each switch with the connector unplugged. A good switch shows continuity when actuated and an open reading when released.
Replace any switch that fails continuity testing, and clean any connector showing green or white corrosion.
Step 4: Test the Ignition Switch and Wiring
With the battery connected and the key in the start position, measure voltage at the starter solenoid’s small terminal. You should read close to battery voltage. If you get battery voltage at the ignition switch input but not at the solenoid, the wire between them or the switch contacts are at fault. Check for chafed insulation, rodent damage, or loose crimp connectors, especially near the steering column and under the seat.
Step 5: Inspect the Starter Solenoid and Starter Motor
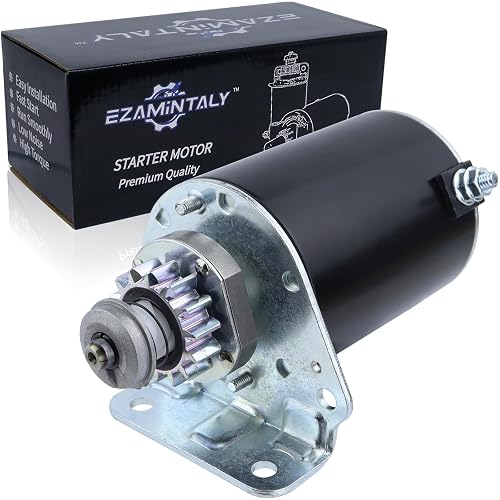
If you hear one solid click, the solenoid is closing but the starter isn’t turning. Test voltage at the large terminal of the solenoid while someone holds the key in the start position. If full battery voltage is present at the input and the solenoid clicks but the starter doesn’t turn, the starter motor is the likely failure. Solenoids can also stick or burn contacts after prolonged cranking; a solenoid that clicks but passes no current needs replacement.
Common Mistakes
- Jump-starting a deeply discharged battery without charging it: This can stress the battery and does not identify the root cause.
- Replacing parts before testing: A new starter won’t help if the battery is weak or a cable is corroded.
- Reconnecting cables in the wrong order: Always disconnect negative first and reconnect it last to avoid short circuits.
- Ignoring the seat or brake switch: These are easy to overlook and cause a “dead” symptom.
- Using a higher-amp fuse: This removes the protection the fuse was designed to provide.
Tips for Preventing the Problem
- Keep the battery on a maintainer or charger during long storage periods.
- Check terminal connections at the start of each mowing season.
- Run the mower at least every few weeks in off-season storage to keep the battery topped up.
- Keep the deck and underside clear of grass buildup that can trap moisture and corrode connectors.
Recommended gear
A basic digital multimeter is the most useful tool for this job, since voltage and continuity readings will tell you more than any guess. A smart battery charger with a maintenance mode helps keep the battery healthy between seasons. A wire brush set and dielectric grease are inexpensive additions that prevent the corrosion that causes many no-start conditions.
- Digital multimeter for automotive and small engine testing View on Amazon
- Smart battery charger and maintainer for 12-volt lawn tractor batteries View on Amazon
- Battery terminal cleaning brush kit View on Amazon
- Dielectric grease for electrical connectors View on Amazon
FAQ
Why does my Husqvarna riding mower make no sound when I turn the key?
Silence usually means no power is reaching the starter circuit. Check battery voltage, battery terminal connections, and the main fuse first. If those are good, look at the safety interlock switches.
Can a bad battery cause no clicking?
Yes. A battery below about 12.0 volts may not have enough power to energize the solenoid, and you may hear nothing or only a faint click. Charge the battery fully and retest before replacing other parts.
What does a single click mean on a riding mower?
A single click means the solenoid is engaging but the starter isn’t turning. Common causes are a weak battery, poor cable connections under load, or a failed starter motor.
How do I know if the seat switch is causing the problem?
Sit on the seat and try starting. If the mower starts with your weight on it but not without, test the seat switch for continuity. Replace it if it doesn’t close properly under pressure.
Should I jump-start my riding mower?
You can use a car battery or charger carefully, but only after confirming the mower’s wiring is intact. Jump-starting can mask an underlying problem, so charge the battery and run the tests in this guide afterward.
How often should I replace a riding mower battery?
Many owners find batteries last several seasons with good maintenance, but service life varies with climate, storage and charging habits. Replace the battery if it fails a load test or won’t hold a full charge.
When should I take the mower to a dealer?
If you’ve checked the battery, fuses, switches and wiring and still have no starting power, or if you smell burning or see heat damage in the harness, stop and have a qualified small engine technician or authorized Husqvarna dealer inspect it. Electrical faults can be a fire risk.
Do I need to remove the blades to test the starter?
Not for electrical testing. Keep the blade engagement switch off and the parking brake set, and make sure the mower is on level ground with the key removed before working near the drive system.
Conclusion
A Husqvarna riding mower that won’t start with no clicking is usually fixed by working through the circuit in order: battery voltage and terminals, fuses, safety switches, ignition wiring, and finally the solenoid and starter. Testing each stage with a multimeter prevents unnecessary parts purchases. If the fault persists after these checks, a qualified technician can complete the diagnosis safely.